Installing an automatic movable partition can transform the functionality and flexibility of any space. As a leading supplier of Automatic Movable Partition, I've witnessed firsthand the impact these partitions can have on various environments, from commercial offices to event venues. In this blog post, I'll guide you through the process of installing an automatic movable partition, sharing valuable insights and tips along the way.
Understanding Automatic Movable Partitions
Before diving into the installation process, it's essential to understand what automatic movable partitions are and how they work. Automatic movable partitions are advanced partitioning systems that can be easily opened and closed with the push of a button. They offer several advantages over traditional fixed partitions, including flexibility, space optimization, and enhanced functionality.
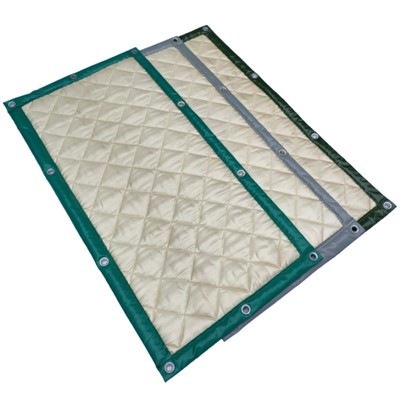
These partitions are typically made of high-quality materials such as aluminum, glass, or wood, and they can be customized to fit the specific needs and design preferences of your space. They are also available in different configurations, including single-panel, multi-panel, and accordion-style partitions, allowing you to choose the option that best suits your requirements.
Pre-Installation Preparation
Proper preparation is crucial for a successful installation of an automatic movable partition. Here are some key steps to take before starting the installation process:
1. Site Assessment
Conduct a thorough site assessment to determine the suitability of your space for an automatic movable partition. Consider factors such as the available space, ceiling height, floor condition, and electrical requirements. It's also important to ensure that the installation area is free from any obstructions or obstacles that could interfere with the partition's operation.
2. Design and Planning
Work with a professional designer or architect to create a detailed design plan for your automatic movable partition. This plan should include the dimensions, layout, and configuration of the partition, as well as any additional features or accessories you may require. Consider factors such as the desired level of sound insulation, fire resistance, and aesthetic appeal when designing your partition.
3. Material Selection
Choose high-quality materials for your automatic movable partition to ensure its durability and performance. Consider factors such as the type of material, finish, and color when selecting your partition. You may also want to consider additional features such as soundproofing, fireproofing, and security options to enhance the functionality of your partition.
4. Electrical and Structural Requirements
Ensure that your space has the necessary electrical and structural requirements for the installation of an automatic movable partition. This may include installing electrical outlets, wiring, and controls, as well as reinforcing the ceiling and floor to support the weight of the partition. It's important to work with a qualified electrician and structural engineer to ensure that all electrical and structural requirements are met.
Installation Process
Once you have completed the pre-installation preparation, it's time to start the installation process. Here are the general steps involved in installing an automatic movable partition:
1. Ceiling Track Installation
The first step in installing an automatic movable partition is to install the ceiling track. This track will support the partition panels and allow them to move smoothly along the ceiling. Use a level to ensure that the track is installed straight and level, and secure it to the ceiling using screws or bolts.
2. Panel Installation
Next, install the partition panels onto the ceiling track. Start by attaching the top of the panels to the track using brackets or hangers, and then lower the panels into place. Make sure that the panels are aligned properly and that they fit snugly against each other. Use a level to ensure that the panels are vertical and that they are installed at the correct height.
3. Floor Guide Installation
Install the floor guide to ensure that the partition panels move smoothly along the floor. The floor guide should be installed along the bottom of the partition panels, and it should be secured to the floor using screws or bolts. Make sure that the floor guide is aligned with the ceiling track and that it is installed at the correct height.
4. Electrical and Control Installation
Install the electrical and control systems for the automatic movable partition. This may include installing electrical outlets, wiring, and controls, as well as programming the partition to operate automatically. It's important to work with a qualified electrician to ensure that all electrical and control systems are installed correctly and that they are safe to use.
5. Testing and Adjustment
Once the installation is complete, test the automatic movable partition to ensure that it is working properly. Open and close the partition several times to make sure that it moves smoothly and that it locks securely into place. Make any necessary adjustments to the partition, such as adjusting the tension of the cables or the alignment of the panels, to ensure that it operates correctly.


Tips for a Successful Installation
Here are some tips to help you ensure a successful installation of an automatic movable partition:
1. Hire a Professional Installer
Installing an automatic movable partition can be a complex and challenging task, especially if you have limited experience with construction or electrical work. It's recommended to hire a professional installer who has experience with installing automatic movable partitions to ensure that the installation is done correctly and safely.
2. Follow the Manufacturer's Instructions
Make sure to follow the manufacturer's instructions carefully when installing the automatic movable partition. The instructions will provide detailed information on how to install the partition, including the tools and materials required, the installation process, and any safety precautions that need to be taken.
3. Use High-Quality Materials
Using high-quality materials is essential for ensuring the durability and performance of the automatic movable partition. Make sure to choose materials that are suitable for your specific application and that meet the required standards and regulations.
4. Conduct Regular Maintenance
Regular maintenance is important for ensuring the long-term performance and reliability of the automatic movable partition. Make sure to clean the partition regularly, lubricate the moving parts, and check for any signs of wear or damage. If you notice any problems with the partition, it's important to have them repaired as soon as possible to prevent further damage.
Conclusion
Installing an automatic movable partition can be a great way to enhance the functionality and flexibility of your space. By following the steps outlined in this blog post and working with a professional installer, you can ensure a successful installation of your automatic movable partition. If you're interested in learning more about our Automatic Movable Partition products or have any questions about the installation process, please don't hesitate to contact us. We're here to help you transform your space with the latest in partition technology.
References
- Manufacturer's installation guide for automatic movable partitions
- Building codes and regulations related to the installation of partitions
- Industry standards for sound insulation and fire resistance in partitions